Workflows and Approvals Business
Workflows give you control over how work items move through states in your project. Think of it as creating guardrails that ensure work follows your team's agreed-upon path, with the right people making decisions at each step.
You define which transitions are allowed, who can make them, and whether certain moves need approval before they take effect.
Every project has a single default workflow that applies to all work items regardless of type. On the Enterprise Grid, you can create additional workflows, each scoped to specific work item types, so different kinds of work can follow their own process.
TIP
If you already had a workflow configured before, it's now your project's default workflow. All your existing transition rules and reviewer settings have been preserved. You can edit them at any time from the Workflows settings page.
Turn on workflows
Head over to your Project Settings and select Workflows from the sidebar. Toggle Enable workflows on at the top of the page.
Once enabled, you'll see your project's default workflow listed with Default and Active badges. This workflow is active by default and governs all work items in the project.
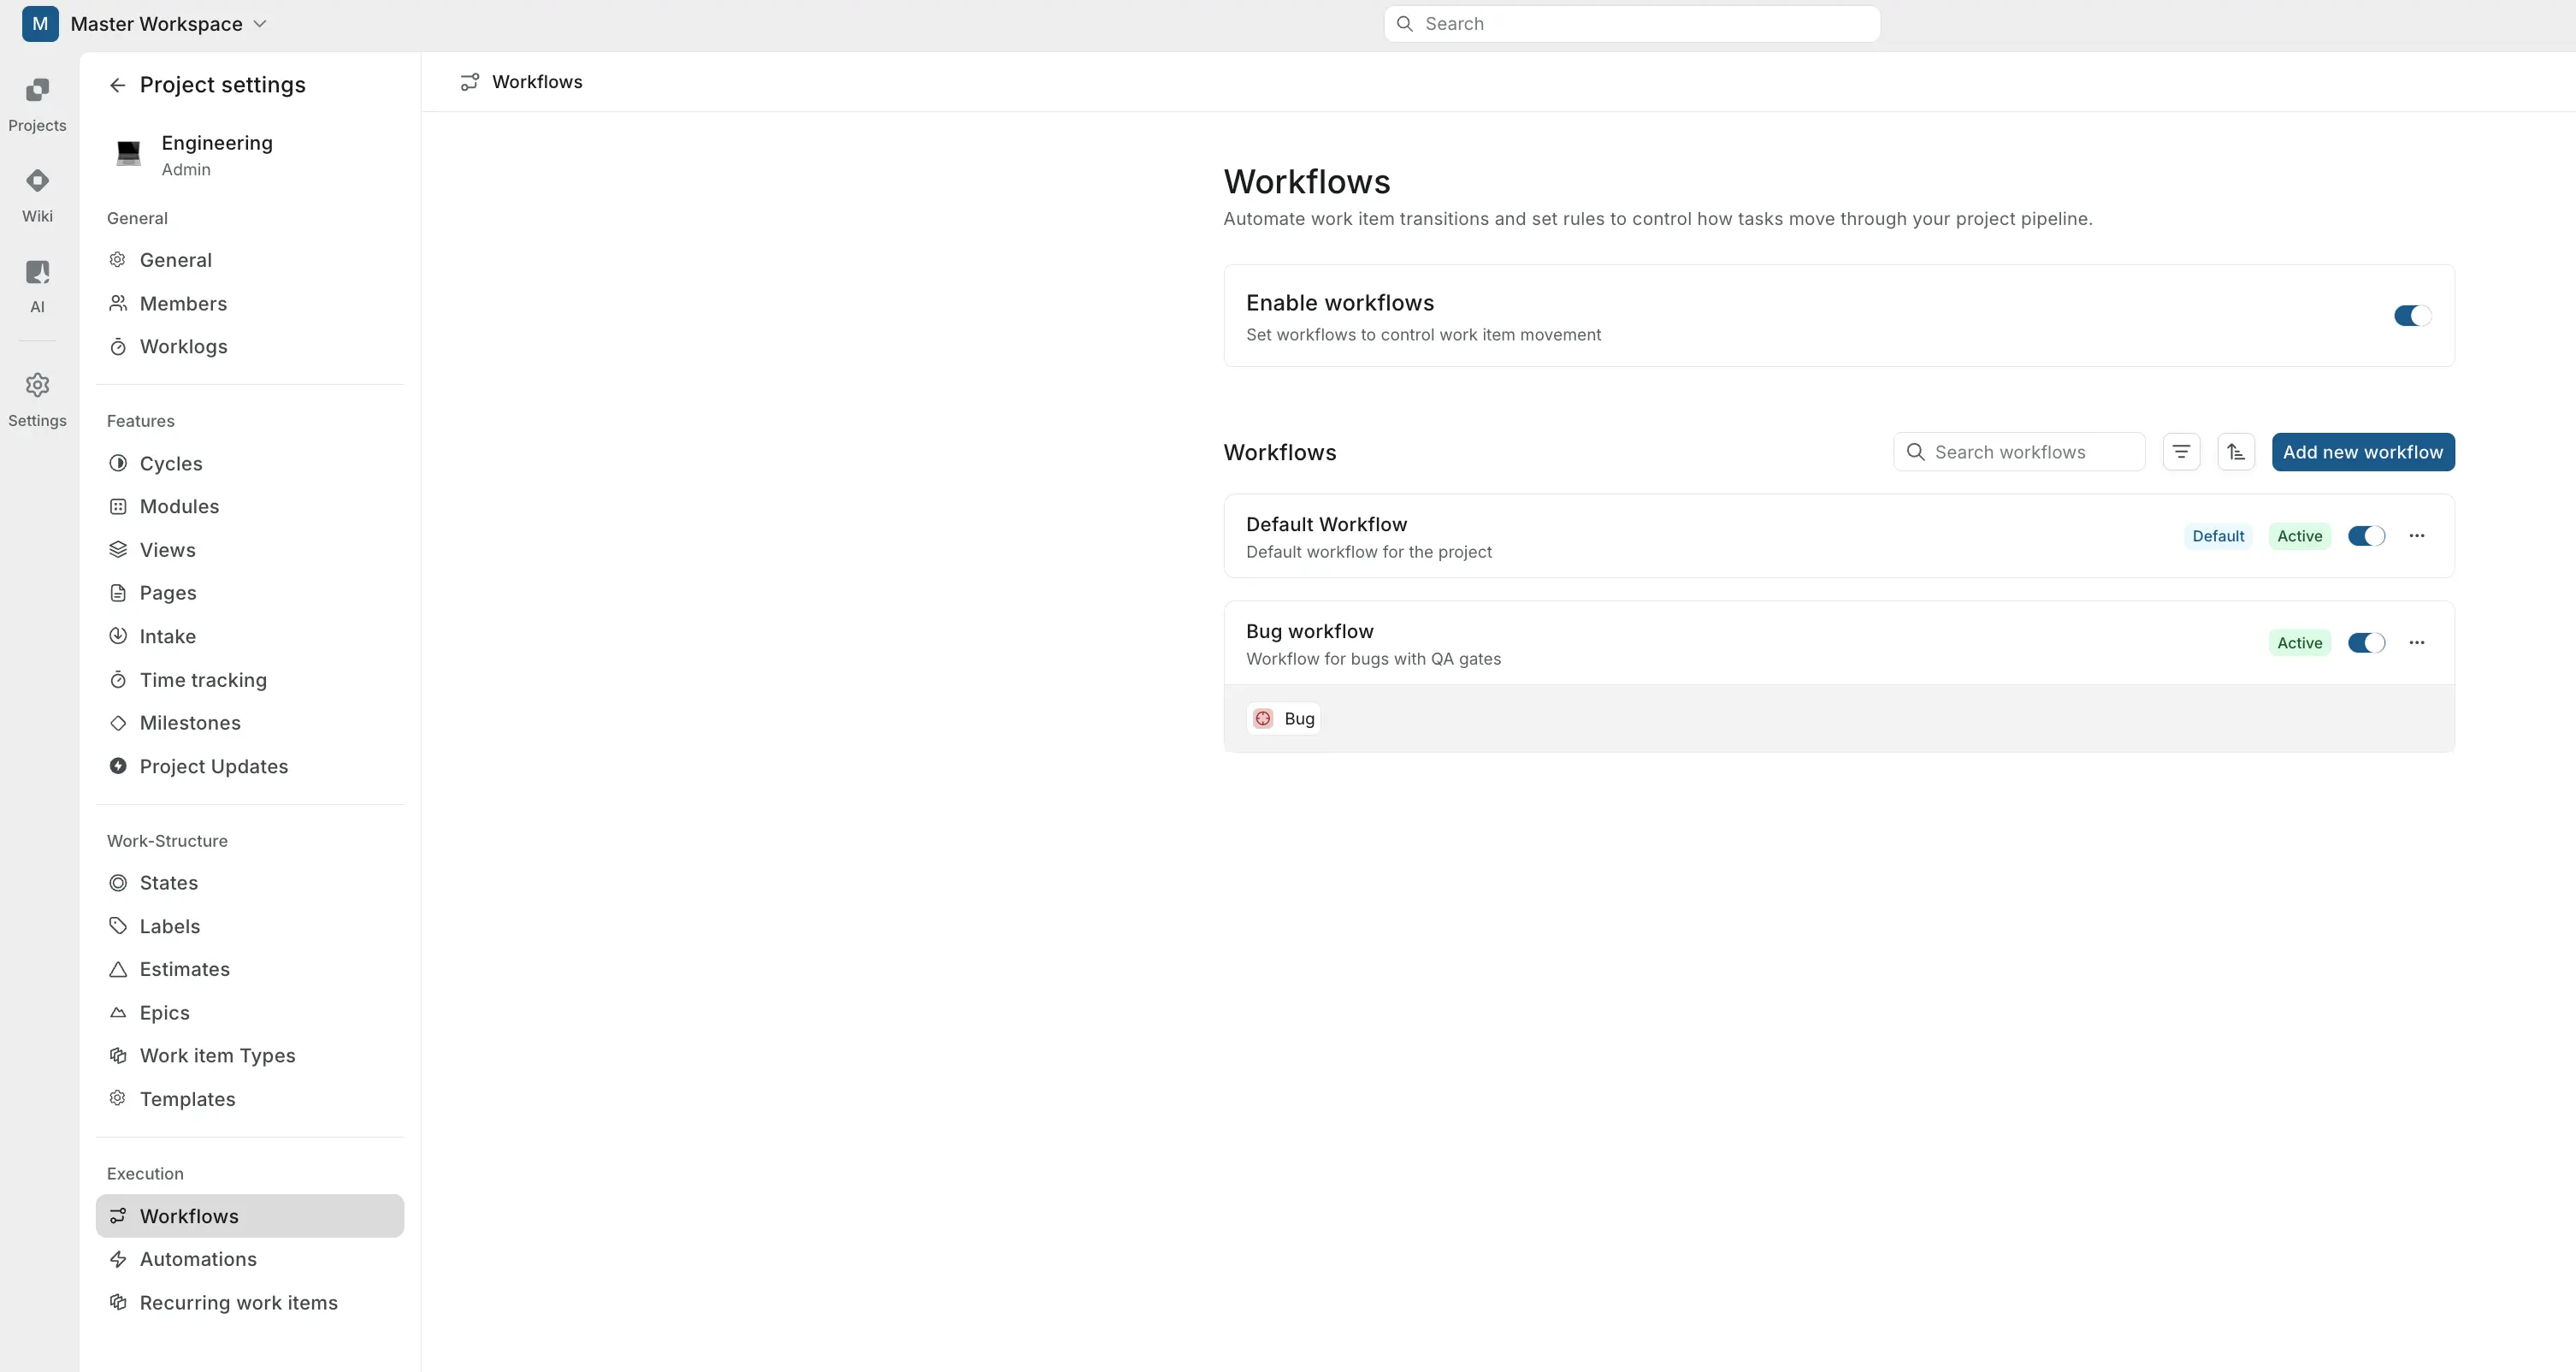
The workflows list includes a search bar to find workflows by name. You can also filter the list by status (Active or Inactive) and by work item type, and sort it by name, date created, or date modified in ascending or descending order.
Define a workflow
Whether you're editing the default workflow or a type-specific one, the workflow detail page works the same way. It lists all the states included in the workflow and lets you add flows that control how work items move between them.
Add states
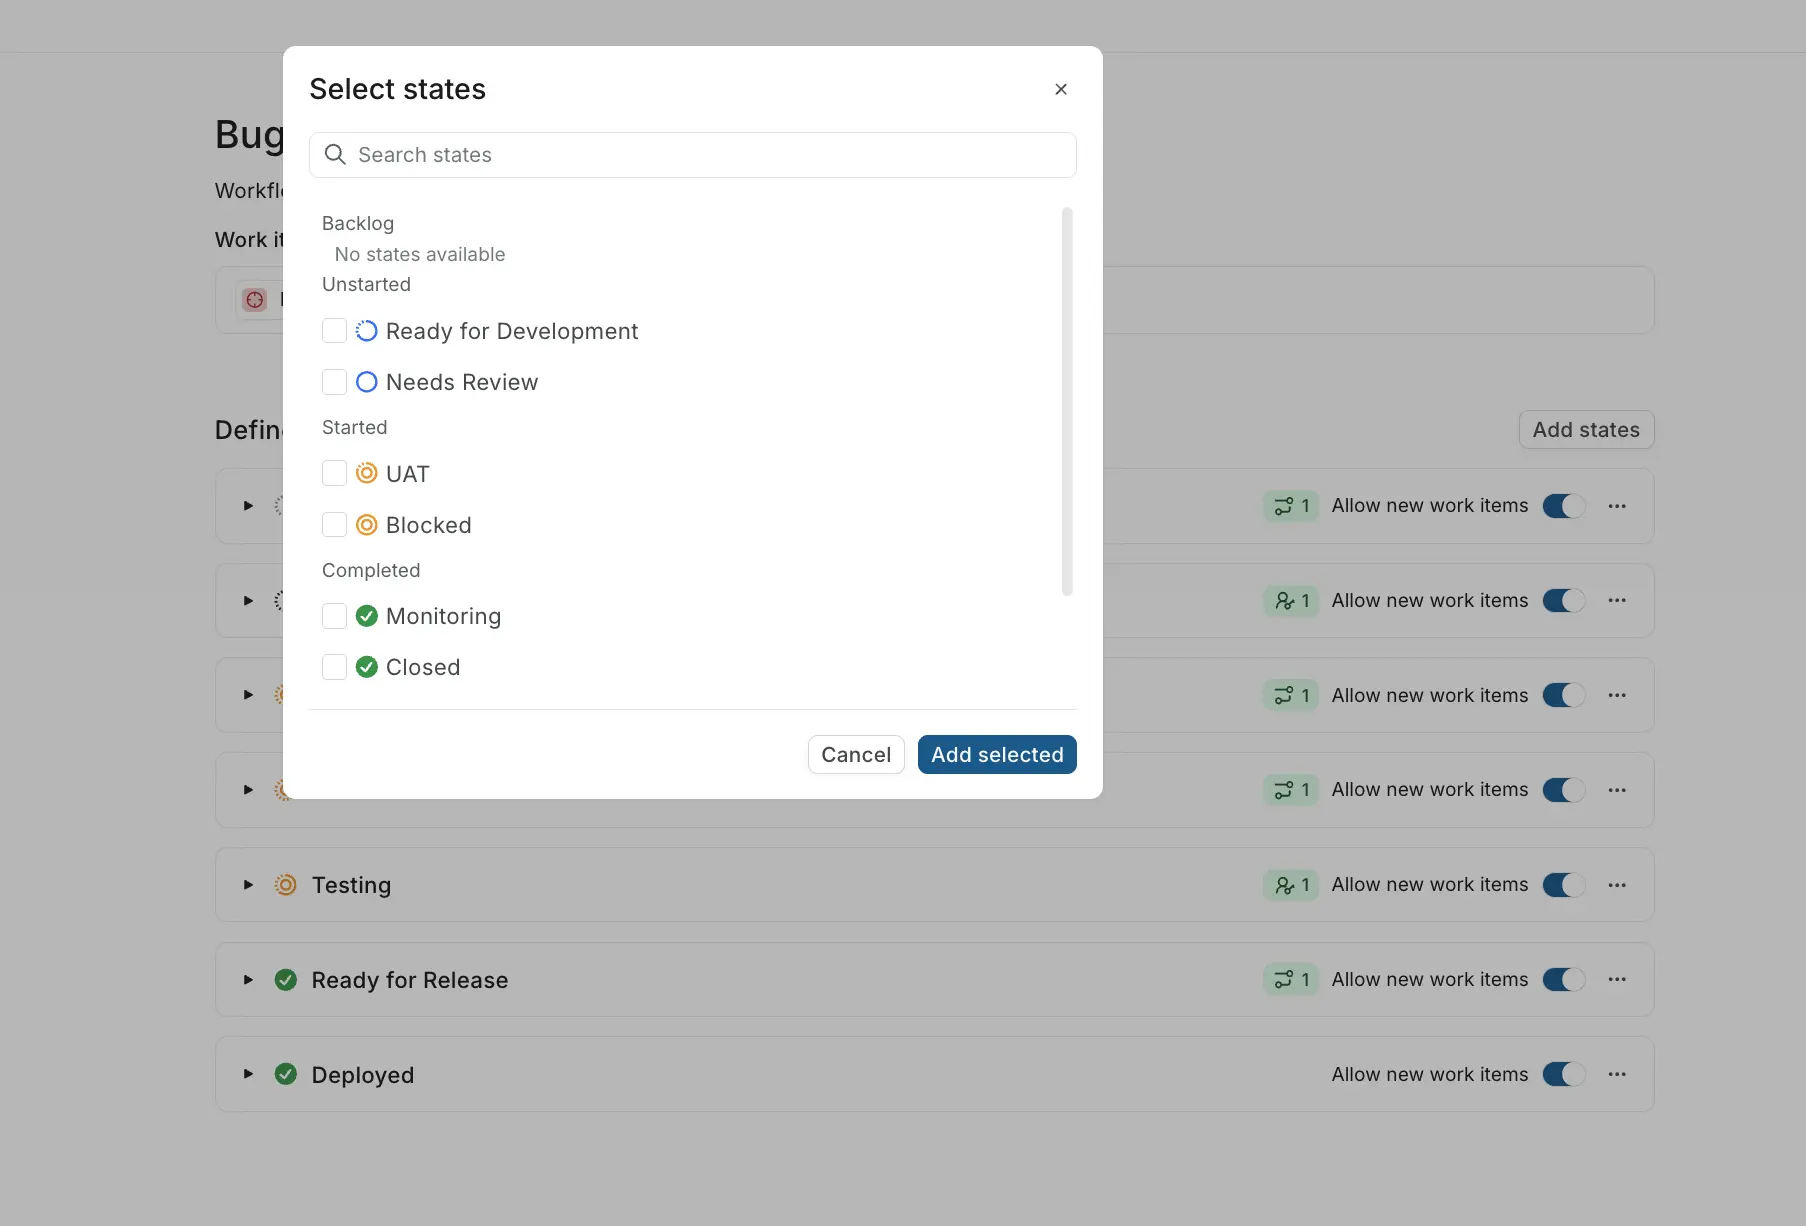
The default workflow includes all states configured in your project. When you create a new workflow, it starts empty. You choose which states to include by clicking Add states in the top-right corner of the "Define workflow" section. A panel lists all available project states grouped by category. Select the ones you need and click Add selected.
Allow new work items
Each state has an Allow new work items toggle on the right side. When this is on, team members can create work items directly in that state. Turn it off for states that should only be reached through progression.

Add flows
Flows define the rules for moving a work item from one state to another. To add a flow, expand a state by clicking its arrow, then click + Add flow. A panel appears on the right where you choose the flow type - Transition or Approval - then click Next to configure it.
You can add multiple flows to a single state, but they must all be the same type - either all transitions or all approvals.
Transition flows
A transition flow defines a permitted state change. When you add one, you configure three fields:
- via - shows Transition to indicate the flow type.
- move to - the destination state. Click to select from available project states on the right pane.
- by - who can make this transition. Defaults to All, meaning any project member. To restrict it, open the Members panel and select specific individuals.
- with - optional conditions that run before or after the transition. See Transition conditions below.
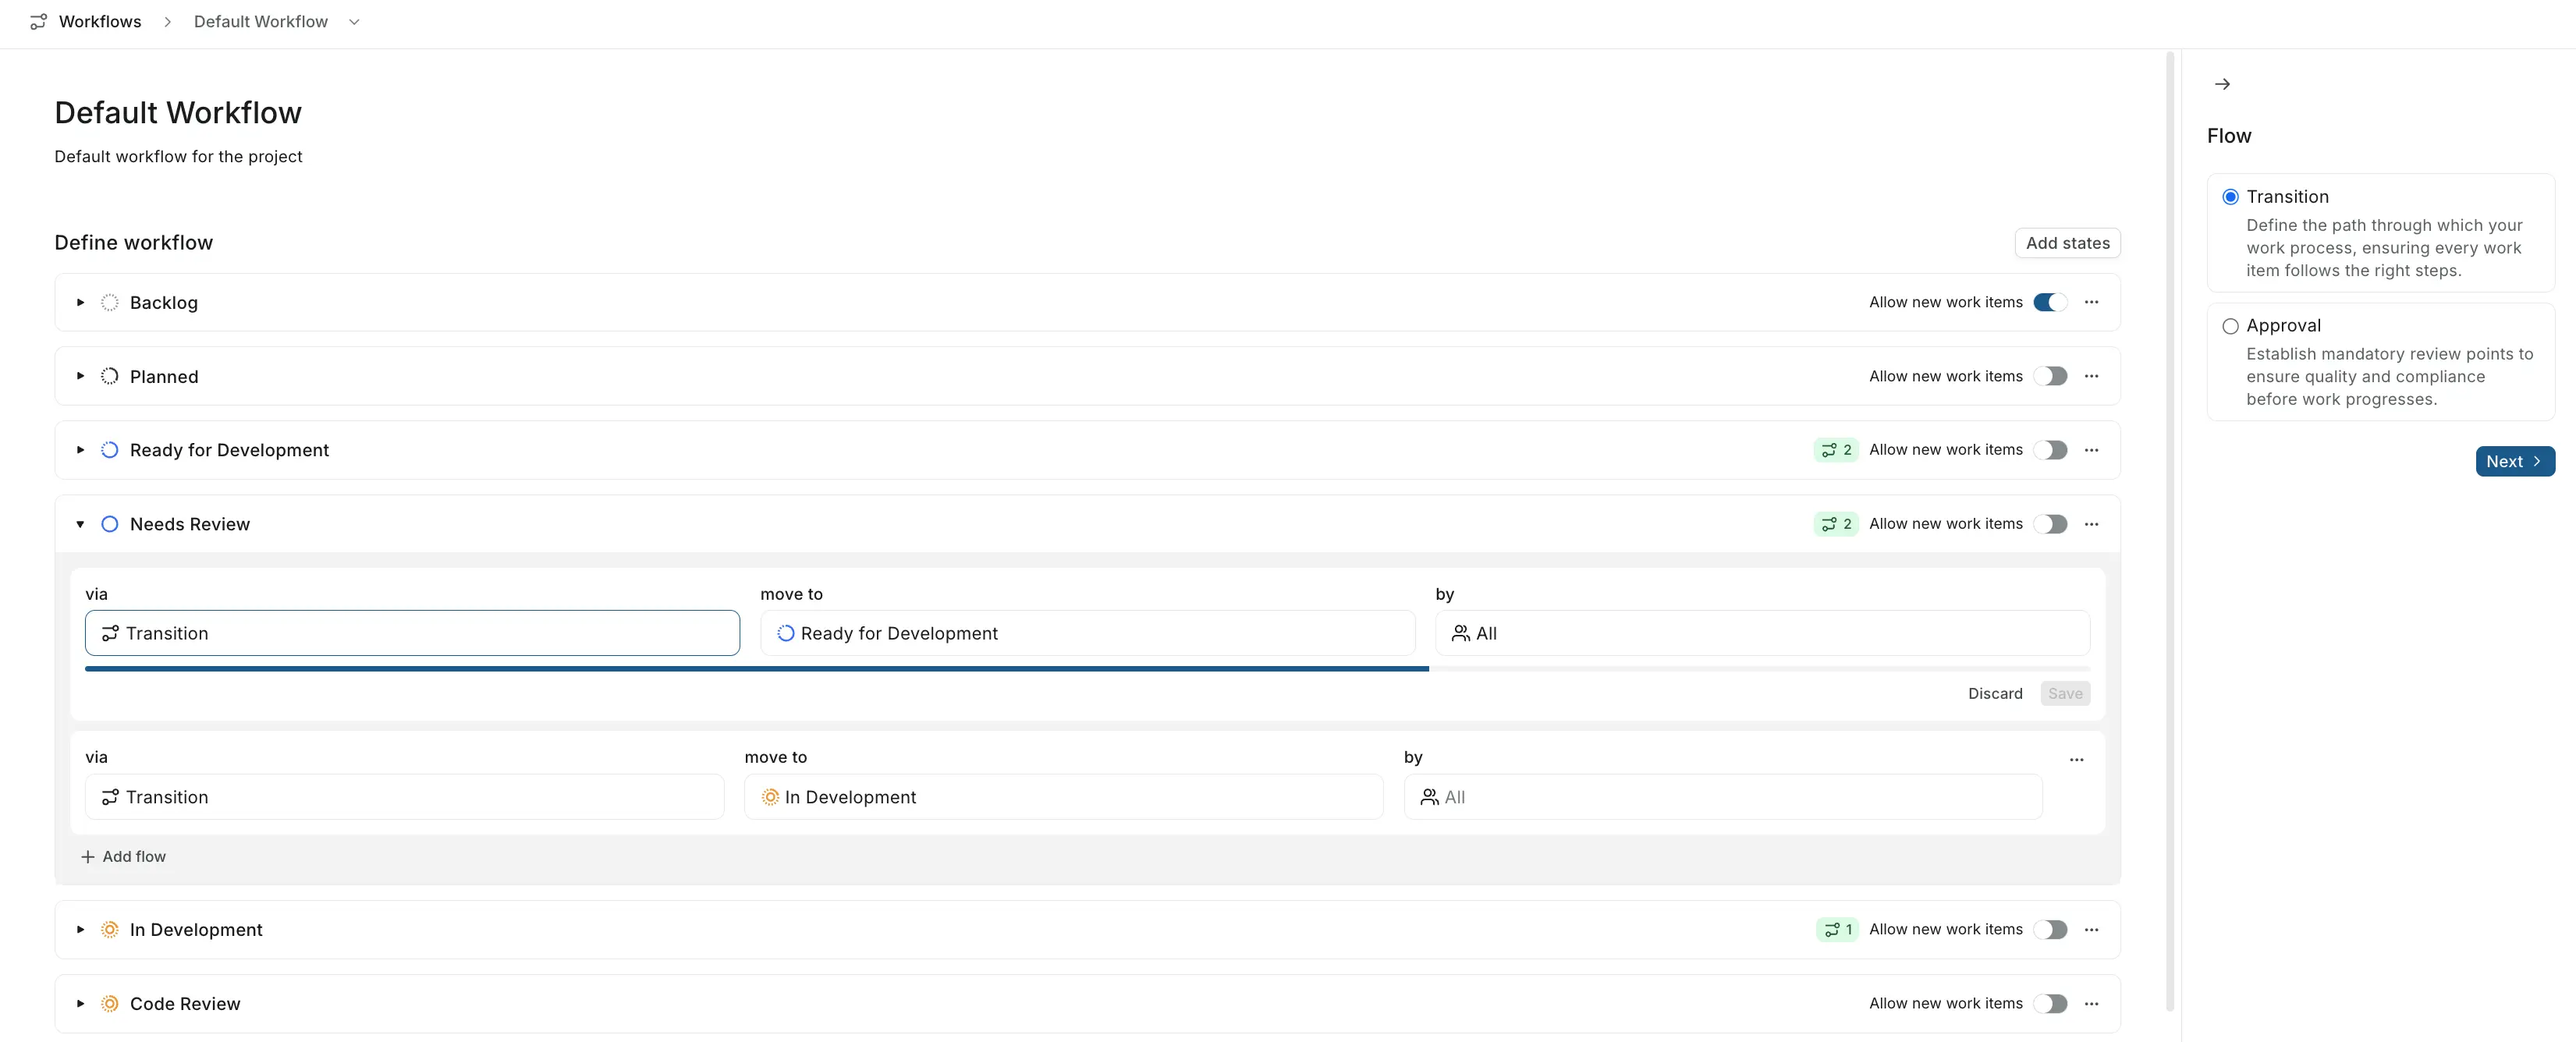
Click Save to confirm the flow, or Discard to cancel it.
Approval flows Enterprise Grid
An approval flow adds a gate: the work item won't move forward until designated approvers accept or reject it. When you add one, you configure:
- via - shows "Approval" to indicate the flow type.
- on approve, move to - the state the item moves to when approved.
- on reject, move to - the state the item falls back to when rejected.
- by - who can approve or reject. Defaults to All, but you can restrict it to specific members.
- with — optional conditions that run before or after the approval decision. See Transition conditions below.
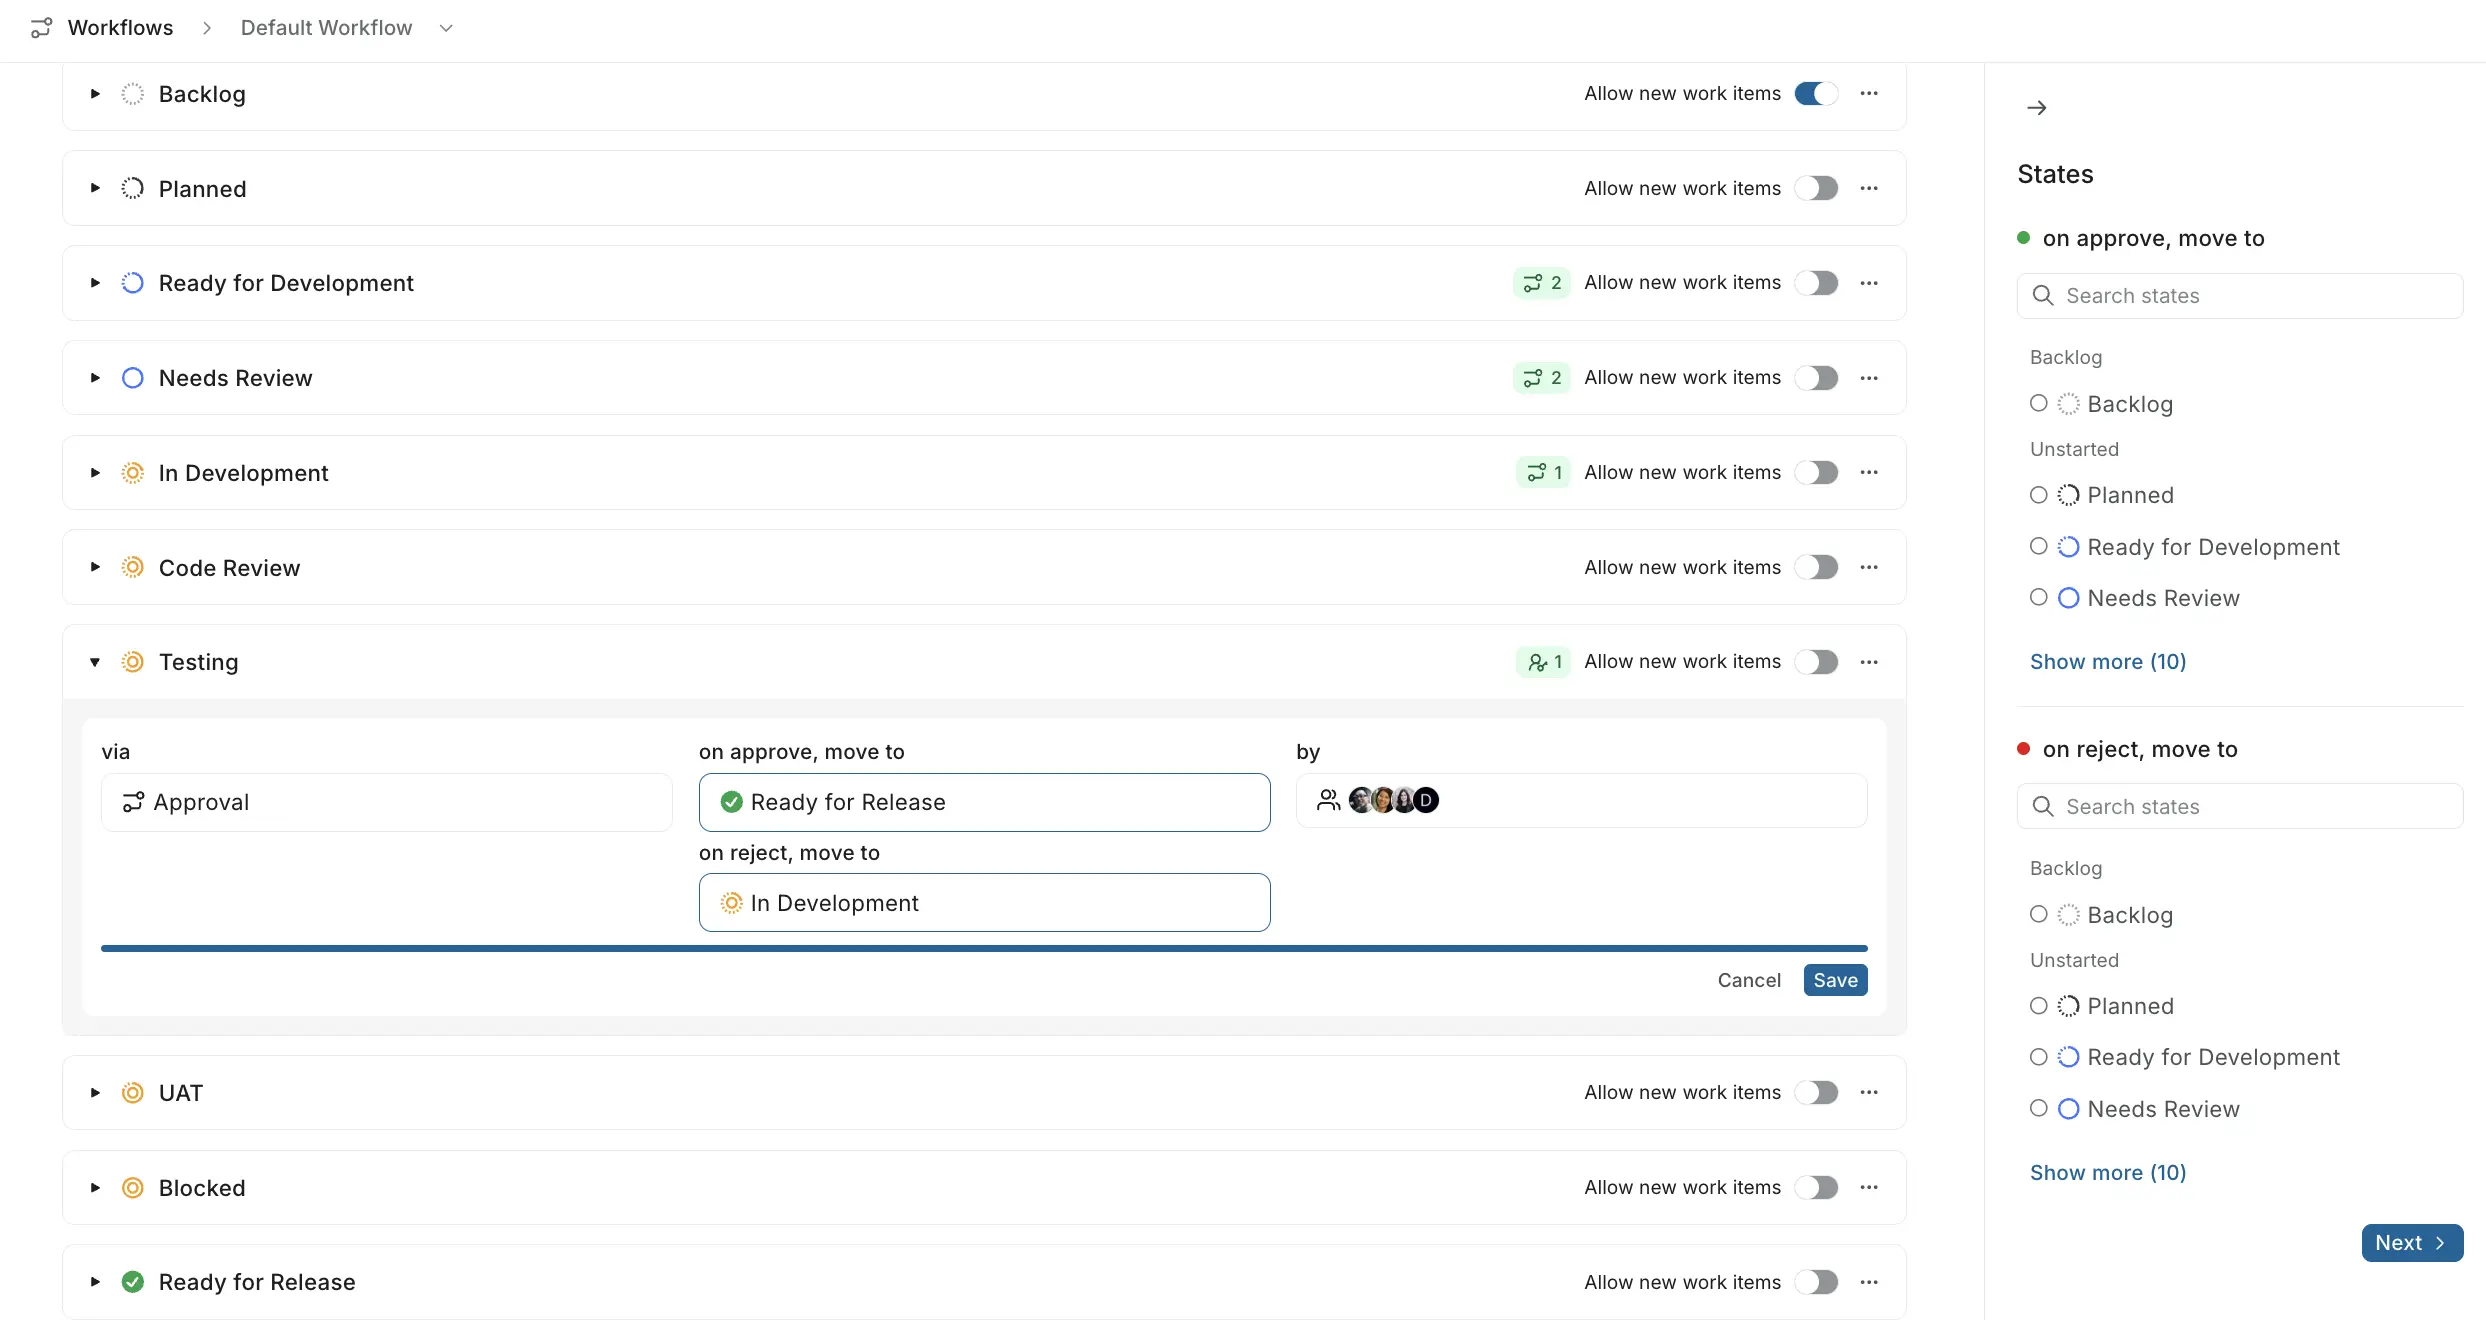
For example, you might add an approval flow on "Testing" so that moving to "Ready for Release" requires sign-off from a QA lead. If rejected, the item moves back to "In Development" for further work.
Transition conditions Enterprise Grid
Transition conditions let you attach custom logic to any transition or approval flow. They use Plane Runner scripts to validate whether a transition should proceed and to perform follow-up actions after it completes.
When you click the Conditions option in the "with" column of a flow, a panel opens on the right with two sections:
Pre-validation
Pre-validation scripts run before a transition happens. They verify that the work item is ready to move — for example, checking that all required fields are filled, that an estimate exists, or that a linked document has been approved.
If a pre-validation script returns { success: false } or throws an error, the transition is blocked and the user sees an error message explaining why. If all pre-validation scripts return { success: true }, the transition proceeds.
You can chain multiple pre-validation scripts — they run in the numbered order shown (#1, #2, etc.). All must pass for the transition to proceed.
To add a pre-validation script:
- In the Conditions panel, under Pre validation, click + Select script.
- Choose an existing Runner script of type "Workflow Transition" from the list.
- Or click New Script to create one inline — the script editor opens with the type pre-set to "Workflow Transition" and a template showing the return rules:
return { success: true }— allow the transition.return { success: false }— block the transition.throw new Error("reason")— block the transition with a specific message shown to the user.
- Click Save and use to save the script and attach it to the condition in one step.
- Click + Add more to chain additional pre-validation scripts.
Post actions
Post-action scripts run after a transition completes successfully. They handle follow-up work — posting a Slack notification, creating a linked work item in another project, adding a comment, updating a custom property, or calling an external API.
Post-action scripts don't block the transition (it has already happened). If a post-action script fails, the transition still stands, but the error is logged in the script's execution history.
To add a post-action script:
- Under Post actions, click + Select script.
- Choose an existing Runner script or create one inline.
- Click + Add more to chain additional post-action scripts.
Example: enforcing quality gates
A common pattern is combining pre-validation and post-actions on a single transition:
Transition: "In Development" → "In Review"
Pre-validation:
- Script #1: Verify the work item has at least one assignee and an estimate.
- Script #2: Verify all sub-work items are completed.
Post actions:
- Script #1: Post a message to Slack notifying the review channel.
- Script #2: Add a "Ready for Review" label to the work item.
If either pre-validation script fails, the developer sees an error message and the work item stays in "In Development." If both pass, the transition happens and the post-action scripts fire in sequence.
For details on writing Runner scripts, including the full SDK reference, available globals, and security model, see Plane Runner.
Activate the workflow
Once you've defined all the states and flows you need, toggle the workflow on from the Workflows settings page to make it active. You can toggle it off at any time to pause enforcement without losing your configuration.
Additional options
The three-dot menu on each workflow provides three options:
- Edit - update the workflow's name, description, or assigned work item types.
- View change history - see a log of all modifications made to the workflow, including who made each change and when.
- Delete - permanently remove the workflow. Work items previously governed by this workflow will fall back to the default workflow.
Create a custom workflow Enterprise Grid
A custom workflow lets you define separate rules for different kinds of work. For example, you might want bug fixes to go through a stricter approval process than feature work, or you might want improvements to skip certain states entirely. When a work item matches a type-specific workflow, that workflow takes precedence over the default.
To create one:
On the Workflows settings page, click Add new workflow.
Give the workflow a unique name and an optional description.
Under Select types, choose one or more work item types that this workflow will govern.
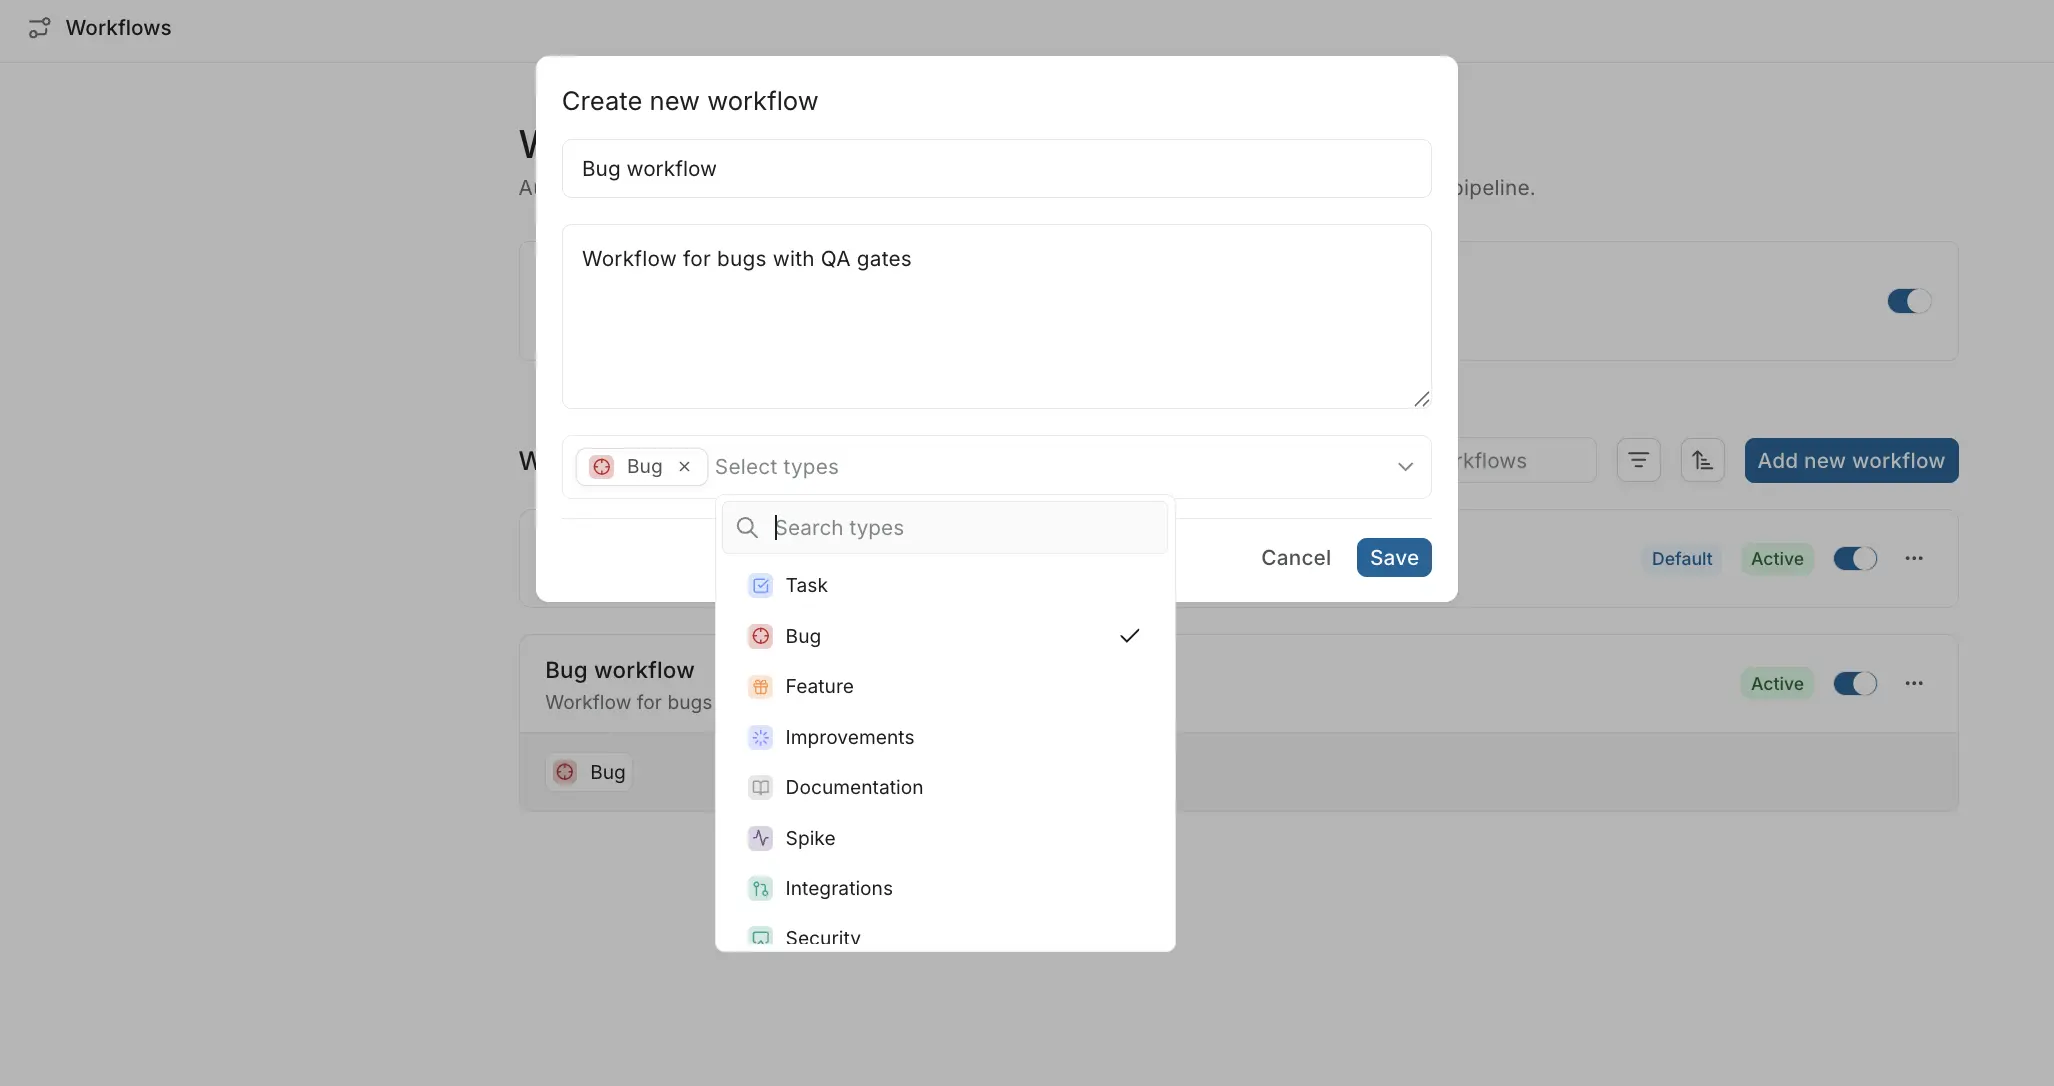
Click Create.
You'll land on the workflow detail page, where you can define its states and flows.
How workflows work
Once a workflow is active, work items in the project follow its rules:
State creation restrictions
Items can only be created in states where Allow new work items is enabled. If a member tries to create a work item in a restricted state, they won't be able to.
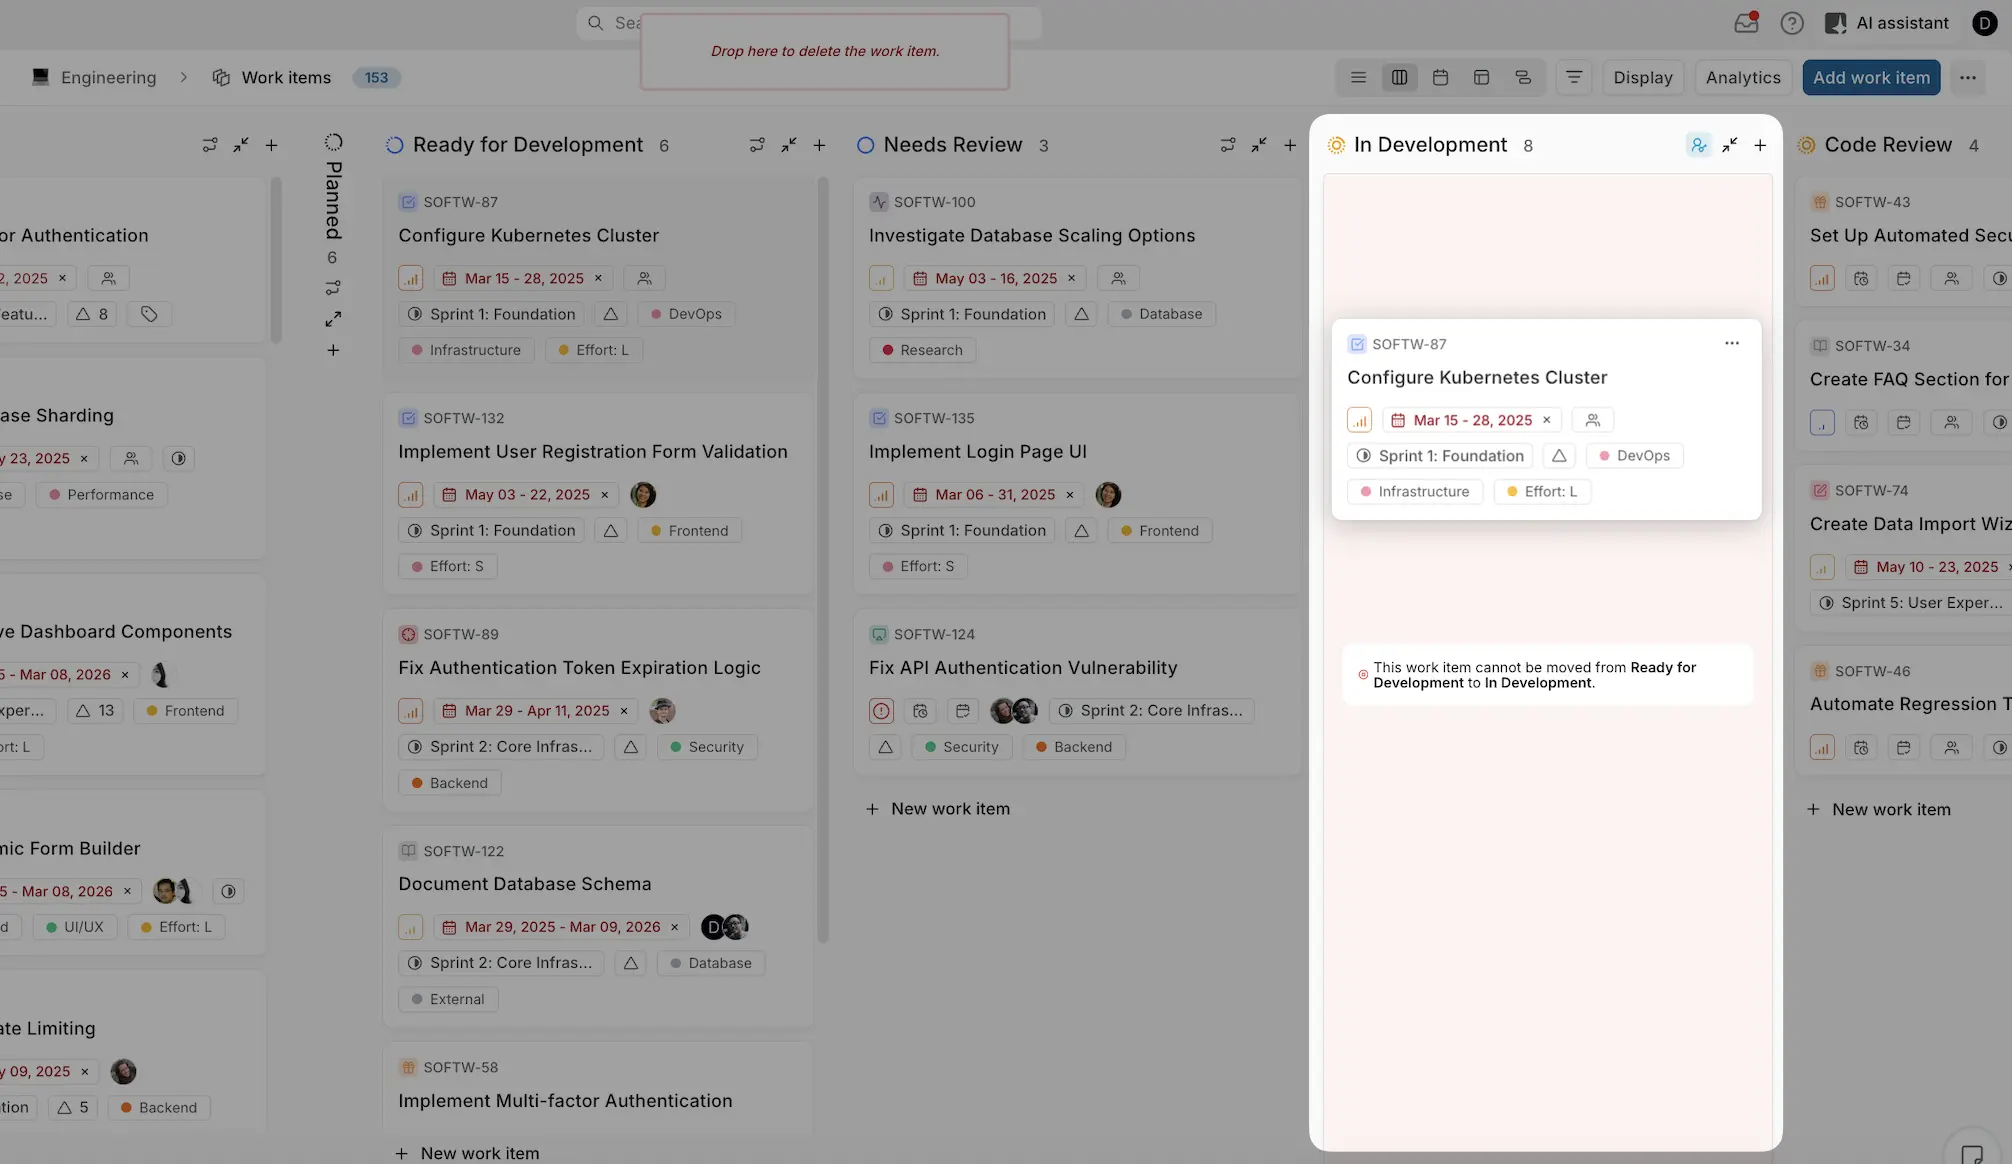
Transition enforcement
Members can only move items along the transitions you've defined. If someone tries to make a state change that isn't permitted, they'll see a blocker message explaining why.
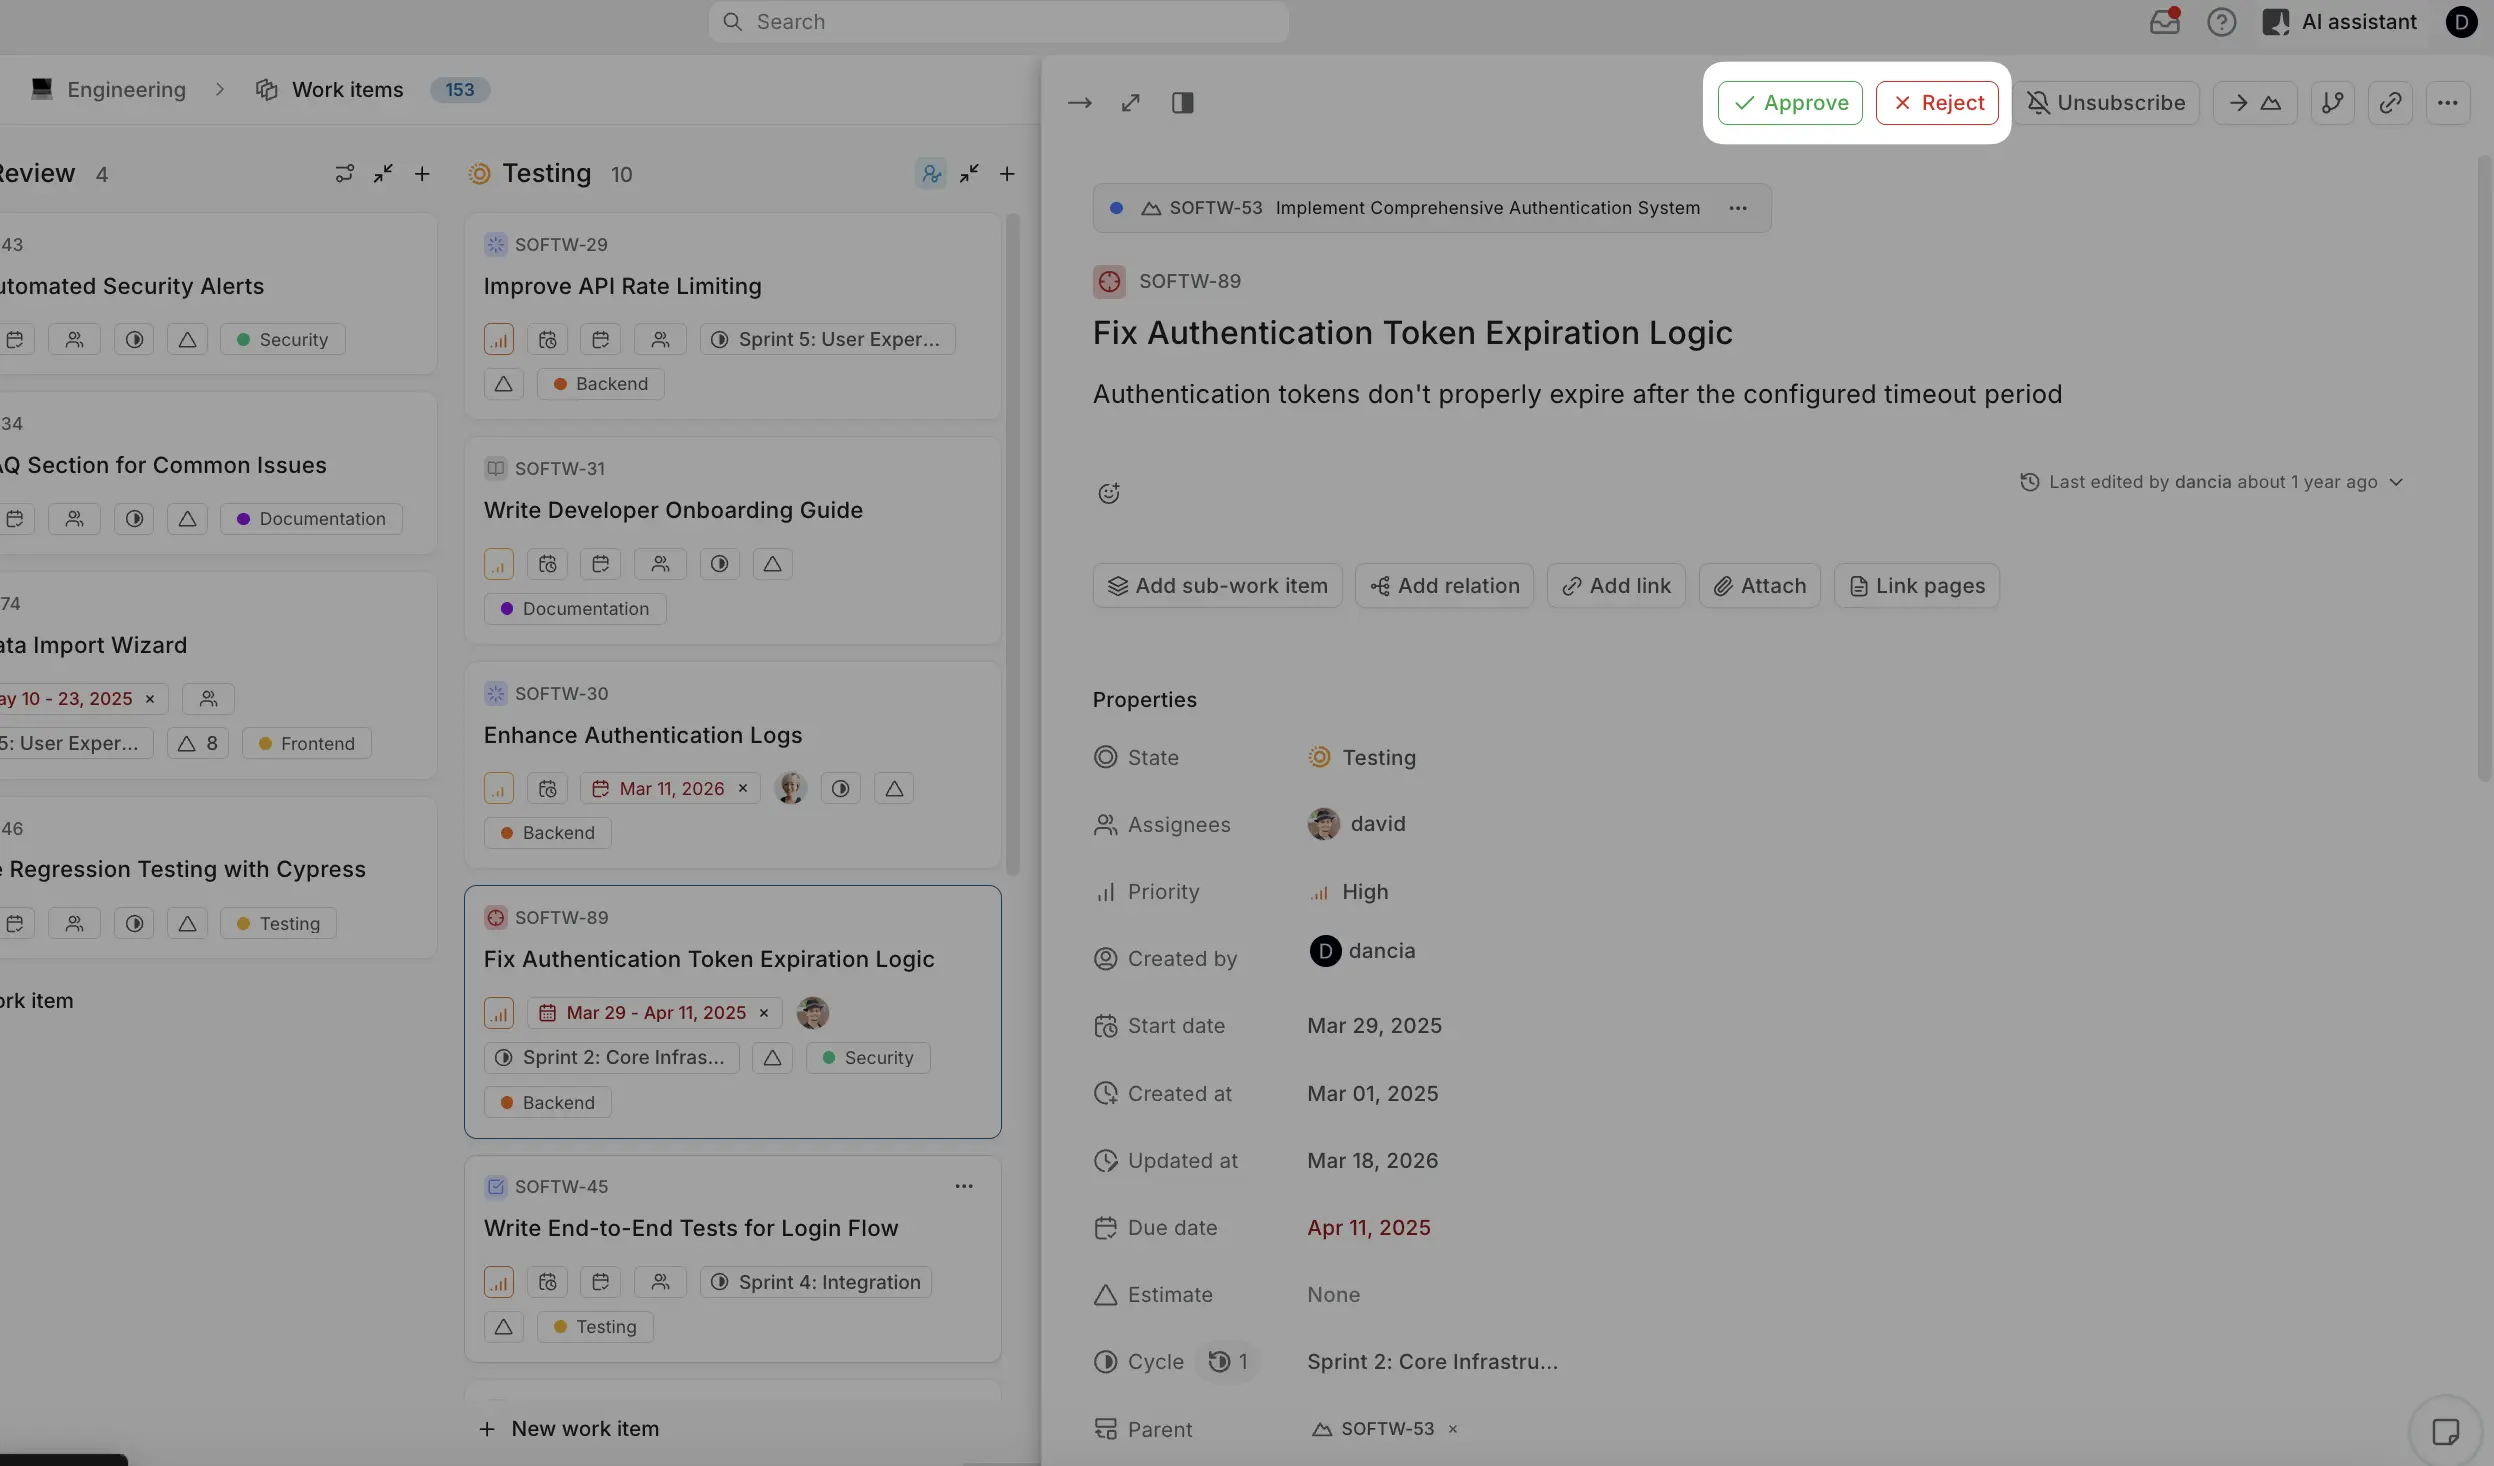
Approval gates
When a work item reaches a state with an approval flow, it enters a pending state. Approvers see Approve and Reject buttons at the top of the work item detail view. The item moves to the appropriate destination based on the approver's decision.
Workflow precedence
If a work item's type matches a type-specific workflow, that workflow's rules apply instead of the default. For example, if you have a type-specific workflow for bugs, any bug in the project follows that workflow's transition and approval rules. All other work item types continue to follow the default workflow.